How to make a 3D city map
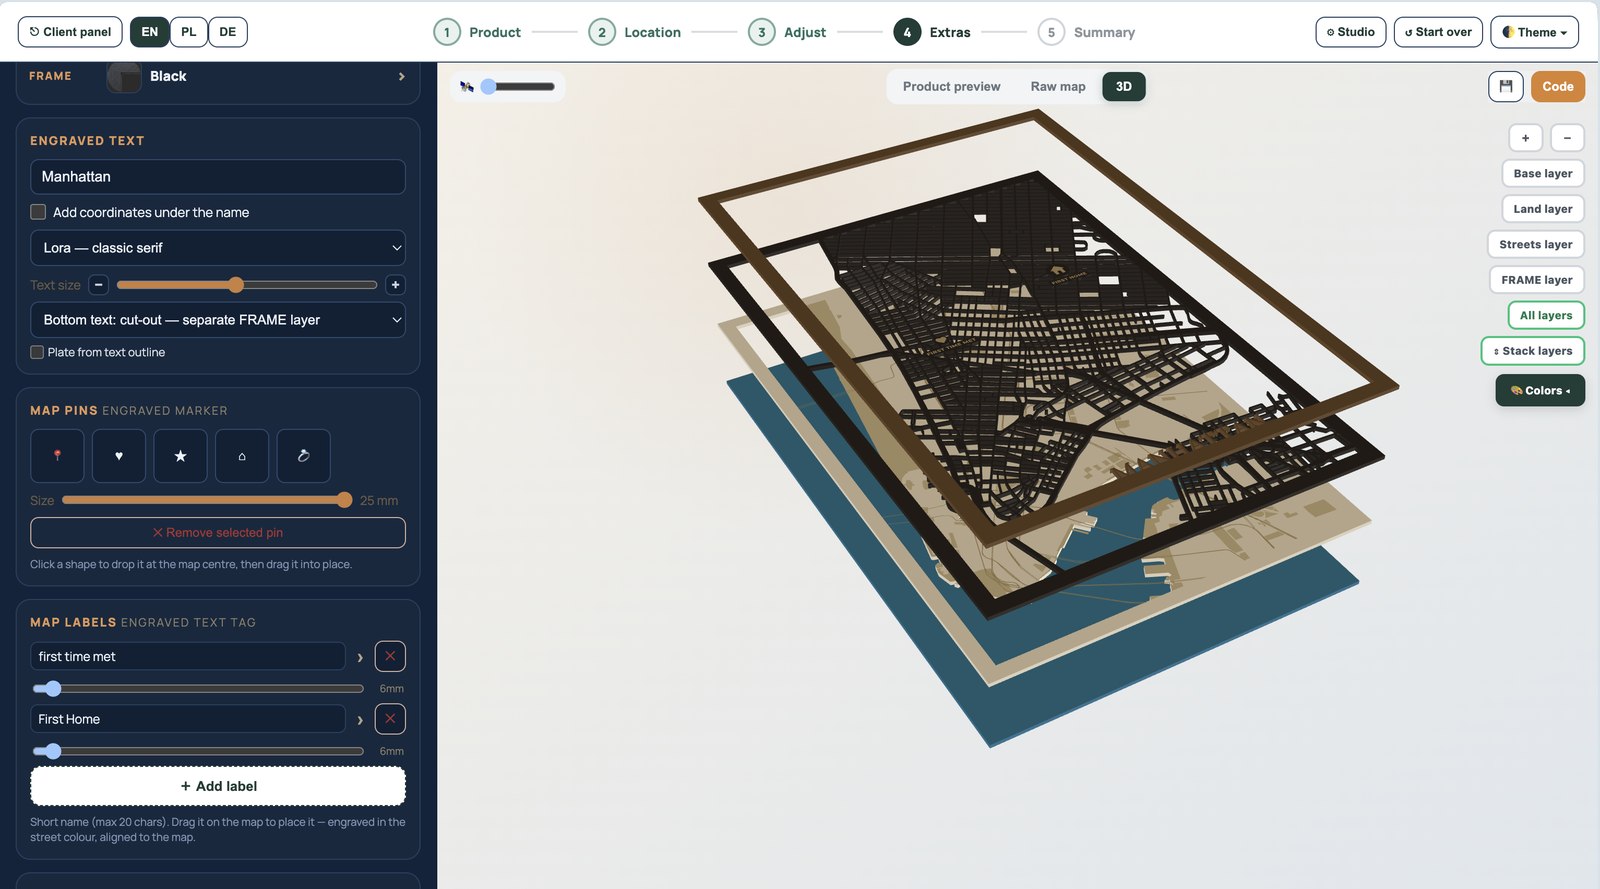
A 3D city map turns a flat street plan into a piece with real depth. The trick is clean, separate layers — here is the full process.
1. Pick the city and the frame size
Choose your location and set the board size so the map renders at true millimetre scale. This decides whether the finest streets survive the cut.
2. Choose the 3D layered style
The map splits into water/base, land, streets and a frame. Each becomes its own named cut layer. See the 3D layered style.
3. Confirm the stack in 3D
Explode the layers on screen to check the depth order and catch overlaps before cutting a sheet.
4. Export and cut layer by layer
Export the layered SVG, then cut each layer separately. Thin streets cut as scores stay strong.
5. Stack and glue
Glue from the base up: water, then land, then streets, inside the frame. Finish with oil or paint for contrast.
New to layered maps? Start with how to make a layered wood map, then read the materials guide.
Frequently asked questions
Everything makers and stores ask before their first laser-ready map.
How many layers does a 3D city map need?
Usually four: water/base, land, streets and frame — plus optional pins and labels. Each is exported as its own named cut.
How thick should each layer be?
2-3 mm plywood or basswood per layer is common; use thicker stock for the base and frame to give the stack a solid feel.
Turn your next location into a laser-ready product.
Free 14-day trial: 50 maps, no card. Commercial use included.